Overview
Macrocarriers are profoundly used in cell culture for the growth of adherent cells in bioreactors. These vary in morphology, size, porosity, materials, etc. Macrocarriers offer several advantages such as increased production yield due to their capability to provide high surface area-to-volume ratio. Macroporous carrier such as BioNOC II® also creates a 3D cell growth that allows cell to cell and cell to extracellular matrix interactions, mimicking the cell's in vivo environment. The use of macrocarriers allow easier scale-up process that reduces further costs in scaling out to more storage spaces throughout the development.
Sampling of macrocarriers and counting of the cells for process development are important steps to monitor the cells’ health and proliferation rate. Consistent results in sampling ensure reproducibility and accuracy. This also allows the assessment of immortalization or transformation, seeding of cells for future experiments, and further use for transfection or infection.
Esco Healthcare’s BioNOC II® macrocarriers allows the growth of adherent cells including animal, mammalian, and insect cells packed in the Tide Motion systems. This macrocarrier is compatible with CelXrocker™, CelCradle™, CelCradle X®, and TideXcell®.
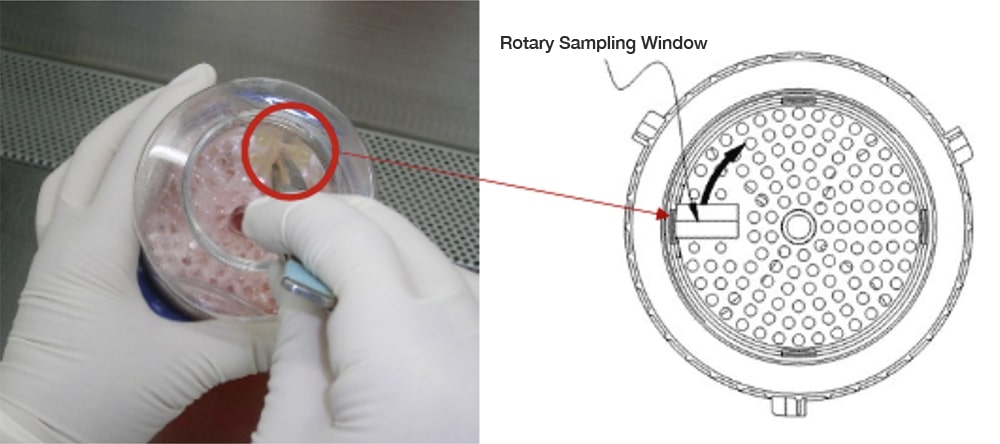
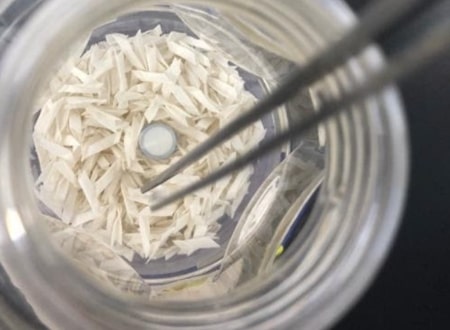
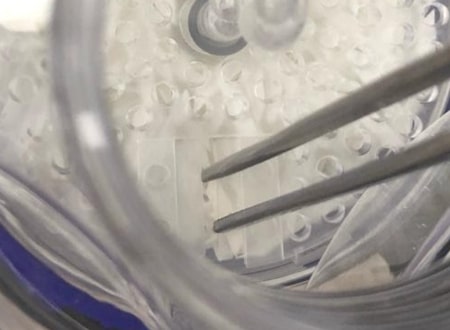
Monitoring the condition of the cells in the BioNOC II® can be done through sampling in the CelCradle™ system. Bring the CelCradle™ bottle inside the biological safety cabinet (BSC) to make sure the sterility of the environment is met. Using pre-sterilized forceps, take out pieces of BioNOC II® macrocarriers from different areas of the bottle and place them in a falcon tube to perform cell growth monitoring.
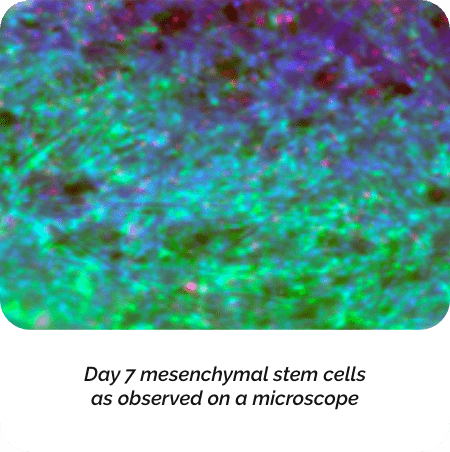
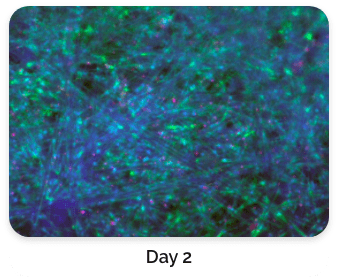
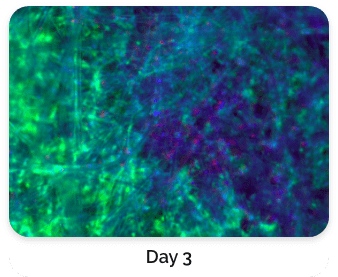
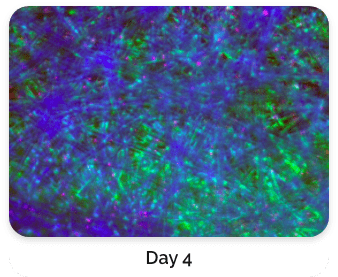
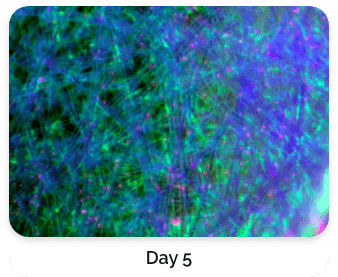
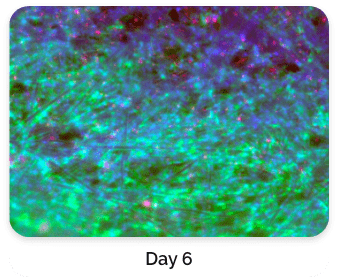
Figure 2 shows a day 7 mesenchymal stem cells observed under a microscope. The cells were stained with different fluorescence dyes to check the viability of the cells in the carriers.
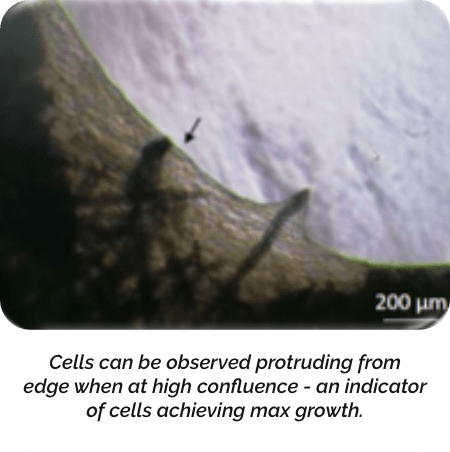
When the cells have grown to maximum confluency, the cells can be seen protruding from the edge. The cells have secreted extracellular matrix, indicating that the cells have actually achieved maximum growth in the BioNOC II® macrocarriers.
Cell staining is a technique used to visualize cells and other cell components using a microscope. This process may involve immersing the sample in a dye solution and then rinsing and observing the sample under a microscope.
Cell Staining on BioNOC II® macrocarriers
Staining with Dyes:
- Aseptically collect 1-2 pieces of BioNOC II® carrier from T- flask or bioreactor vessel.
- Dehydrate and fix the cells using 70% ethanol dehydration 5 minutes, and then 99.5% ethanol dehydration for additional 5 minutes.
- Wash off the ethanol twice, using either deionized (DI) water or phosphate-buffered saline (PBS).
- Stain the cells with hematoxylin, or hematoxylin and eosin (H&E) dye for 5-10 min.
- Wash off the excess dye with DI water.
- Observe the carriers with cells under a light microscope with a bright field.
Note: Other types of dyes may be used, eg. Trypan blue. Use fluorescence dye for staining to obtain clearer cellular morphology.
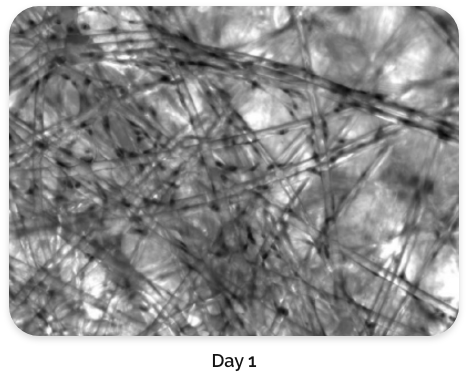
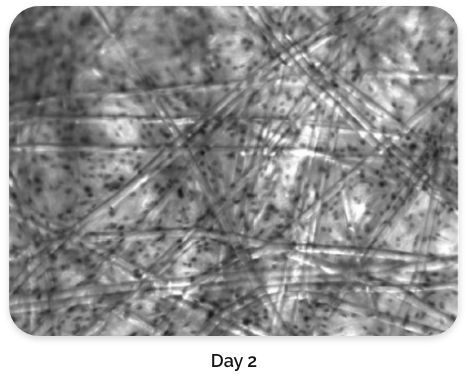
Figure 4. Cell staining on BioNOC II®
Figure 4 shows a comparison of stained BioNOC II® macrocarriers from Day 1 to Day 3.
Cells have evidently propagated on Day 3.
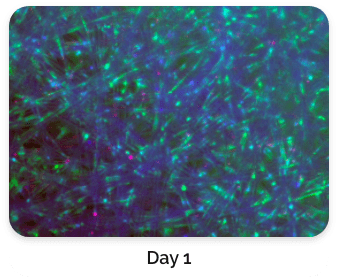
Live Cell Staining with Fluorescence Dyes
- Aseptically sample 1-2 BioNOC II® carrier from T- flask and transfer to 24 well plates.
- Add 500 μL of culture media to the well. Add dyes at the following final concentrations: 1 μg/mL of Hoescht 33342 (Thermo Fisher, H3570), 1 μM calcein green (Thermo Fisher, C34852 and 1 μg/mL PI (propidium iodide, Sigma Aldrich P4170) in culture media.
- Incubate the carriers for 30 min at 37°C, 5% CO2 before capturing images at their respective filters (Blue for Hoechst 33342, green for calcein green and red for PI).
Note: Other types of fluorescence dyes can be used to visualize the cells. Eg. fluorescein diacetate, cell tracker, etc.
Figure 5. Green: Fluorescein diacetate (cytoplasm), Blue: Hoechst 33342 (nucleus), Red: propidium iodide (dead cells)
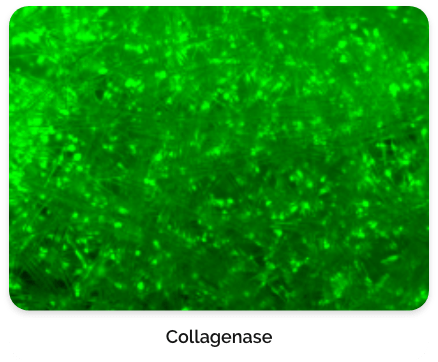
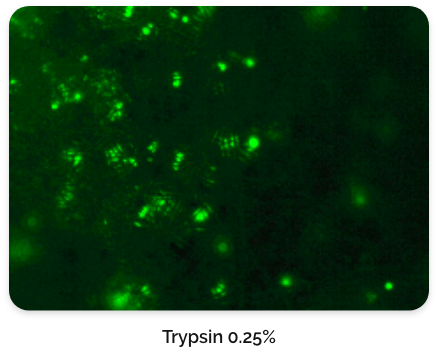
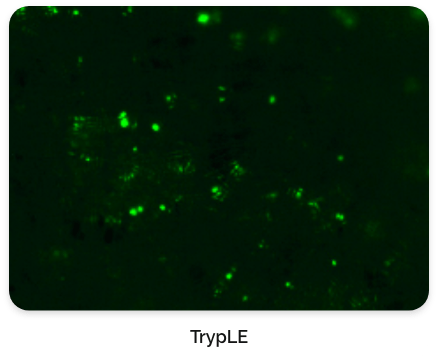
For this type of process that relies on macrocarriers, the cells are typically released by exposing them to an enzyme for a short incubation period. It is very crucial and expertise is needed to find the right concentration of enzyme and incubation time to not damage or kill the cells due to over-exposure.
Different enzymes are available for harvesting such as:
- Collagenase I, II, III, IV
- Accumax/Accutase
- Trypsin 0.05%/0.25%
- Tryple Express/Select
- Dispase
- Hyaluronidase
- Dnase
- Elastase
Protocol for Small Scale Harvesting for Cell Counting
- Transfer at least 3 carriers from the T-flask to 1.5 mL centrifuge tube.
- Rinse the carriers in PBS 3 times. Discard all PBS used.
- Add 1 mL of dissociation enzyme to each tube.
- Incubate the tubes at 37°C, 5% CO2 for 30 min.
- Transfer the dissociation enzyme into 15 mL tubes.
- Add 1 mL of 10% Fetal Bovine Serum (FBS) to each 1.5 mL centrifuge tube for neutralization of enzymes.
- Flick the 1.5 mL tube firmly with a pen for 30 sec. Transfer the solution to the 15 mL centrifuge tubes.
- Repeat steps 6 and 7 for two more times using PBS in place of 10% FBS.
- Centrifuge the 15 mL tubes at 200 g for 5 min.
- Aspirate, re-suspend the cell pellet and perform cell count per carrier.
- Stain the harvested carriers with 1 μl FDA and observe for cells that failed to detach using a microscope.
Figure 6. CL-MSC cells left behind after harvest.
Cell counting plays a major role in assessing cell viability. Knowing the number of viable cells is crucial for standardizing the succeeding phases of the experiments. This is important especially for downstream experiments that require a specific, accurate, and consistent number of cells for the next steps of the process. For cell culture, measuring the number of cells grown in the carriers is essential to determine the level of confluence before passaging for optimal cell growth.
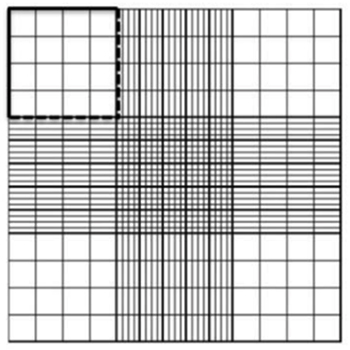
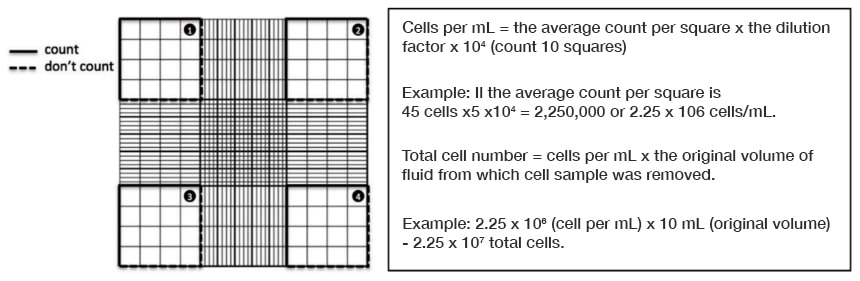
Hemocytometers are made of special optical glass on which cell suspensions are loaded in specified volumes and counted under a microscope. Hemocytometers consist of two counting chambers, each of which is divided into nine large 1mm squares, on an etched and silvered surface separated by a trough.
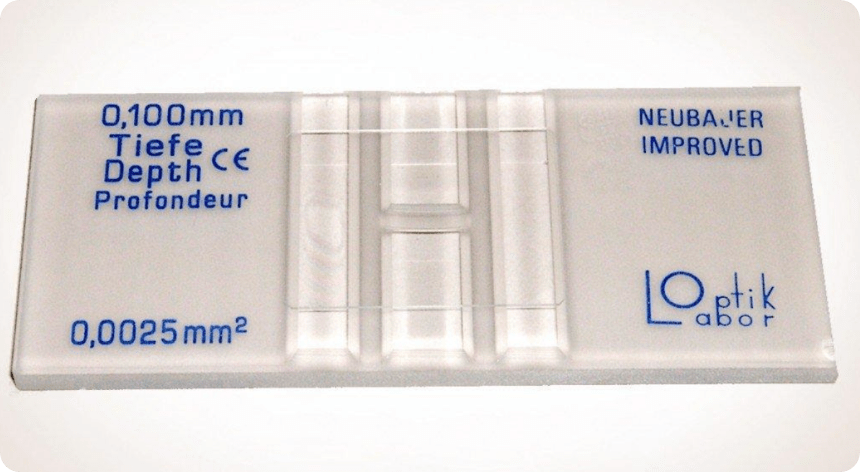
Figure 7. image of a hemocytometer
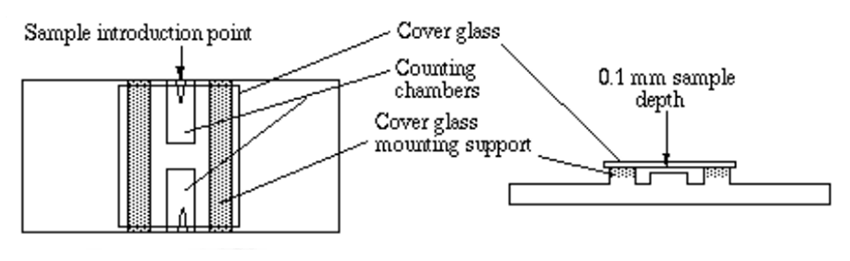
Figure 8. Parts of a hemocytometer
Steps on Cell counting
-
Prepare a suspension sample of cell culture to perform a cell count. If cell viability is going to be determined as well, a viability dye or stain such as trypan blue should be used (1:1 dilution usually works best). This will be the counting solution. Dilute further if sample is very concentrated.
-
Place a glass slide on top (making sure that it does not move; if it does, put some ethanol/water to stick it to the surface) and pipette 10-20μL of the count solution (dilute if necessary, add viability dyes if determination of the difference between live and dead cells is needed).
-
Carefully introduce the solution in the space between the slide and the hemocytometer (it will go in by capillarity). This part is done when space is filled.
-
Place the hemocytometer under the microscope in such a way that the first small square of the top big square is visible in the middle of the field of view.
-
Once the cell numbers are obtained in the first square, proceed to the second (the one on the top right) and repeat the process. Remember, counting procedures should be consistent. If counting started with the cells on the top and right sides but not the ones on the bottom and left sides of the first square, then this must also be done on the second one.
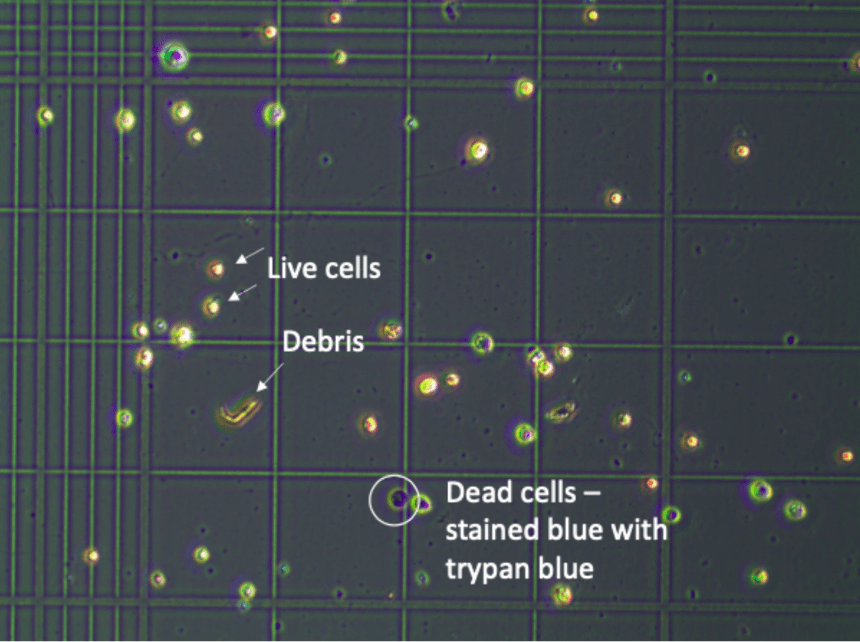
Figure 9. Example of cells on hemocytometer